


Preparing your home for Exterior Painting involves several essential steps to ensure a smooth and successful project. Proper preparation is key to achieving a professional finish and extending the life of your paint job. Start by thoroughly cleaning the exterior surfaces to remove dirt, grime, and mildew. This step is important for ensuring good paint adhesion.
Next, inspect for damaged areas, such as cracked siding or peeling paint, and make necessary repairs. Sand the surfaces to create a smooth base for the paint. Don’t forget to cover windows, doors, and landscaping to protect them from paint splatters. By following these key steps, you can set the stage for a high-quality exterior painting job that looks great and lasts longer.
Understanding Exterior Painting Preparation
Proper preparation is essential for a successful exterior painting project. This initial phase sets the stage for a long-lasting and visually appealing paint job. Understanding the steps involved helps ensure that every surface is ready for paint, reducing the likelihood of issues like peeling or uneven color. Preparation involves several tasks, including cleaning, repairing damage, and protecting areas not being painted.
Following a systematic preparation approach, you can avoid common pitfalls and ensure that your exterior painting project runs smoothly. This foundational work is necessary to create a solid base for paint adhesion and to extend the lifespan of the new paint job. The process may seem involved, but taking the time to prepare correctly pays off with a high-quality finish and a more durable result.
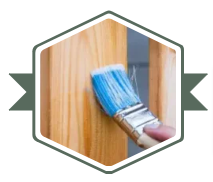
Cleaning the Exterior Surfaces
Cleaning the exterior surfaces of your home is the first step in preparing for exterior painting. Over time, surfaces can accumulate dirt, grime, and mildew, interfering with paint adhesion. To effectively clean your home’s exterior, use a pressure washer or a garden hose with a high-pressure nozzle to remove loose debris.
For stubborn stains and mildew, a mixture of water and a mild detergent can be used and applied with a scrub brush or sponge. Ensure all areas are thoroughly rinsed to remove any soap residue. This step is crucial for creating a clean, smooth surface that allows the paint to adhere correctly. Neglecting this process can result in paint not sticking well, leading to premature peeling or fading.
Inspecting and Repairing Damage
Before you start painting, it’s essential to inspect the exterior of your home for any damage that needs to be addressed. Common issues include cracked or peeling paint, rotting wood, and damaged siding. Identifying and repairing these problems ensures a smooth and even paint application. Start by scraping away any loose or peeling paint and filling in cracks with an appropriate filler or caulk.
For more significant repairs, such as rotting wood, you may need to replace affected sections or treat the wood to prevent further damage. Once repairs are made, sand the surfaces to make them smooth and even. Properly addressing these issues before painting helps prevent future complications and ensures a more durable and visually appealing finish.
Sanding and Surface Preparation
Sanding is a key step in preparing exterior surfaces for painting. This process helps create a smooth surface, which is essential for proper paint adhesion and a professional-looking finish. Begin by using coarse-grit sandpaper to remove any rough patches or old paint. After the initial sanding, switch to a finer grit to smooth out the surface and eliminate any sanding marks.
This step also helps open the surface for better primer and paint adhesion. Pay special attention to areas that have been repaired or patched, as these spots must be blended seamlessly with the surrounding surface. Proper sanding ensures the paint adheres well and the final coat looks smooth and consistent.
Priming the Exterior Walls
Priming is an important step in exterior painting that helps ensure a uniform and long-lasting finish. Primer creates a base layer that improves paint adhesion and helps cover any surface imperfections or stains. Choosing the suitable primer depends on the type of exterior material and the condition of the surface.
For example, a high-quality acrylic primer is often suitable for most surfaces, while special primers may be needed for surfaces with stains or high moisture. Apply the primer evenly using a brush, roller, or sprayer to cover all areas. Allow the primer to dry completely before applying the top coat of paint. This step helps with paint adhesion and enhances the overall appearance and durability of the paint job.
Protecting Your Home and Surroundings
Protecting areas that won’t be painted is essential for a successful exterior painting project. Carefully cover these areas to prevent paint from accidentally splattering or dripping onto windows, doors, and landscaping. Start using painter’s tape to mask off edges around windows and doors, ensuring a clean separation between painted and unpainted surfaces.
Cover landscaping elements like shrubs and flower beds with drop cloths or plastic sheeting. Make sure these coverings are securely fastened to prevent wind displacement. Taking these precautions helps safeguard areas not intended for paint and ensures that your project maintains a clean and professional appearance. Proper protection avoids unnecessary cleanup and contributes to a polished final result.
Selecting the Right Paint and Color
Selecting the right paint and color is essential for a successful exterior painting project. The choice of paint and color will impact not only the look but also the durability of your home’s exterior.
- Choose the Right Paint Type: Opt for a high-quality exterior paint that suits your home’s material, such as acrylic for most surfaces or oil-based for specific needs. Quality paint enhances longevity and appearance.
- Consider Climate Conditions: Select paint designed for your local climate to ensure it can withstand temperature fluctuations and weather elements, helping prevent premature wear and damage.
- Match Paint to Surface Material: Different surfaces, like wood, stucco, or vinyl, require specific types of paint for proper adhesion and finish. Ensure compatibility and durability for the best results.
- Test Color Samples: Apply small paint samples on your home’s exterior to observe how colors look in different lighting conditions. This helps avoid surprises and ensures the final choice meets expectations.
- Factor in Home Style and Surroundings: Choose colors that complement your home’s architecture and surrounding environment. Harmonizing with these elements enhances curb appeal and creates a cohesive look.
Preparing the Painting Area
Preparing the painting area is essential in ensuring a successful exterior painting project. Begin by organizing all your tools and materials, including brushes, rollers, paint trays, and ladders. Having these items readily accessible will streamline your painting
process and prevent unnecessary delays. Safely set up ladders or scaffolding to reach higher areas, and ensure your workspace is free of obstacles to avoid accidents.
Cover the ground and any nearby surfaces with drop cloths or tarps to protect them from paint spills and splatters. Properly organizing and preparing your workspace will improve efficiency and help maintain a clean and safe environment throughout the project. This preparation sets the foundation for a smooth and effective painting process.
Weather Considerations for Exterior Painting
Weather conditions significantly influence the success of an exterior painting project. For the best results, aim to paint when the weather is mild and dry. Extreme temperatures, high humidity, or rain can interfere with the paint’s drying time and final appearance. Ideally, exterior painting should be done when temperatures range from 50 to 85 degrees Fahrenheit.
Painting in very hot or cold weather can lead to problems such as bubbling, streaking, or poor adhesion, which may affect the longevity and quality of the paint job. Before starting your project, check the weather forecast to ensure suitable conditions. Planning your painting work around favorable weather conditions helps ensure the paint dries evenly and maintains a smooth, professional finish.
Final Preparations Before Painting Begins
Before starting your exterior painting project, ensure every detail is in place for the best results. Proper final preparations help avoid common issues and set the stage for a flawless finish.
- Inspect All Surfaces: Check for any missed spots or last-minute issues. Confirm that all cleaned, repaired, and primed areas are ready for paint to ensure a smooth application.
- Organize Your Supplies: Arrange your paint, brushes, rollers, trays, and other tools within easy reach. A well-organized workspace promotes efficiency and helps avoid interruptions during the painting process.
- Review Protective Measures: Double-check that all areas not intended for painting are properly covered. Ensure painter’s tape and drop cloths are securely placed to prevent paint from affecting unintended surfaces.
- Confirm Weather Conditions: Verify that the weather forecast is favorable for painting. Ideal conditions are mild temperatures and dry weather to ensure proper drying and adhesion of the paint.
- Prepare for Cleanup: Have cleaning supplies and materials ready after the job. Preparing for cleanup in advance helps you efficiently handle any spills or accidents and maintain a tidy work area.
Thorough preparation is the key to a successful exterior painting project. By cleaning surfaces, repairing damage, sanding, priming, and protecting your home and surroundings, you set the stage for a smooth, durable finish. Attention to detail at each step ensures the paint adheres well and looks great for years. Investing time in preparation will pay off with a professional-looking result that enhances your home’s appearance and value.
Ready to transform your home with a fresh coat of paint? Contact Full Coverage Painting at 600 Buckeye St., Vacaville, CA 95688, or call 707-384-5108. Our expert team is here to assist with all your exterior painting needs, ensuring a flawless finish that lasts. Reach out today for a consultation, and let us help you bring your vision to life!

