


Transforming a room with a fresh coat of paint can breathe new life into any space, but achieving a flawless finish requires more than just picking a color. Proper room painting techniques and attention to detail are essential for a smooth and professional result. Whether you’re a first-time painter, mastering the art of painting can make a significant difference in your home’s aesthetic appeal. Dive into these expert tips and tricks to ensure your next painting project turns out perfectly.
Preparation: The Key to a Successful Paint Job
Before diving into the room painting process, thorough preparation is essential to achieving a professional-looking result. Proper prep work not only ensures a smooth application but also helps in avoiding common pitfalls.
- Assessing the Room: Start by evaluating the condition of your walls, ceiling, and trim. Look for any cracks, holes, or imperfections that need repair. Addressing these issues before painting will ensure a smoother finish.
- Choosing the Right Paint: Select the appropriate paint type and finish based on the room’s purpose and desired look. Options include matte for a flat look, satin for a subtle shine, semi-gloss for durability, and gloss for a high shine.
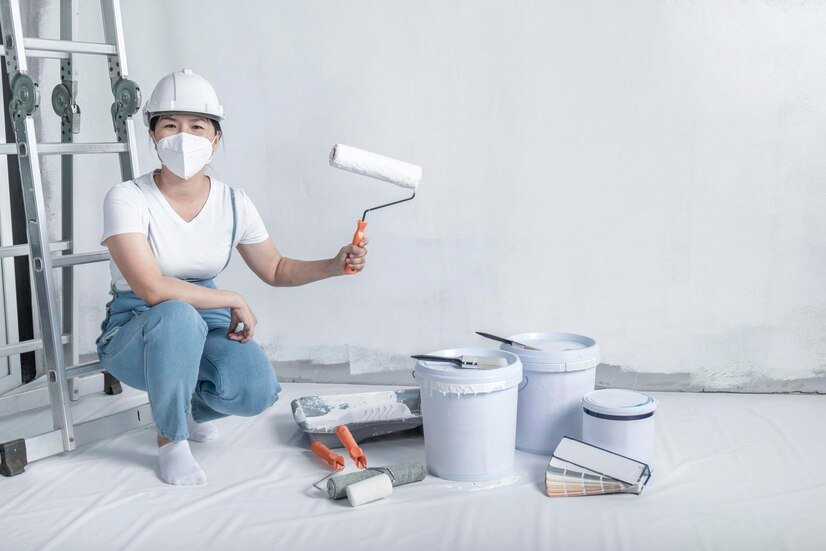
- Gathering Supplies: Compile all necessary tools and materials: high-quality brushes, rollers, painter’s tape, drop cloths, a paint tray, and a ladder. Investing in good supplies can make a significant difference in the outcome.
- Preparing the Space: Clear the room of furniture or move it to the center and cover it with drop cloths. Protect flooring with drop cloths or plastic sheeting. Use painter’s tape to mask off edges around windows, doors, and trim, ensuring crisp, clean lines.
- Cleaning and Repairing Surfaces: Clean walls to remove dust and dirt, which can affect paint adhesion. Fill in any holes or cracks with spackle or joint compound, then sand smooth once dry. For areas with stains or oil, consider a primer to ensure proper paint coverage.
Techniques for a Smooth Application
Achieving a flawless finish in room painting largely depends on the techniques used during application. Mastering these methods can help you avoid common issues like streaks and uneven coverage.
Priming the Surface
Applying a primer is essential, especially on new or previously repaired surfaces. Primer creates a uniform base, sealing the surface and enhancing paint adhesion, which leads to better coverage. Choose a primer that matches the type of paint you’re using, whether it’s latex or oil-based, and ensure it’s suitable for the wall’s condition. For stains or high-traffic areas, a stain-blocking primer may be necessary to ensure a consistent finish.
Choosing the Right Tools
- Brushes: Brushes are perfect for detailed work and cutting in around edges. Opt for high-quality, angled brushes to reach corners and trim with precision. A well-made brush will have firm bristles that hold paint well and reduce shedding, resulting in smoother strokes.
- Rollers: Rollers are ideal for covering large, flat surfaces quickly. Choose a roller with the appropriate nap length: a short nap is best for smooth walls, while a longer nap is needed for textured surfaces. Ensure the roller cover is evenly coated with paint to prevent streaks.
- Sprayers: Paint sprayers can efficiently cover extensive areas and achieve a smooth finish, but they require practice to avoid overspray and drips. Use a sprayer for large projects or when a very smooth finish is desired, and practice on a small area first to master the technique.
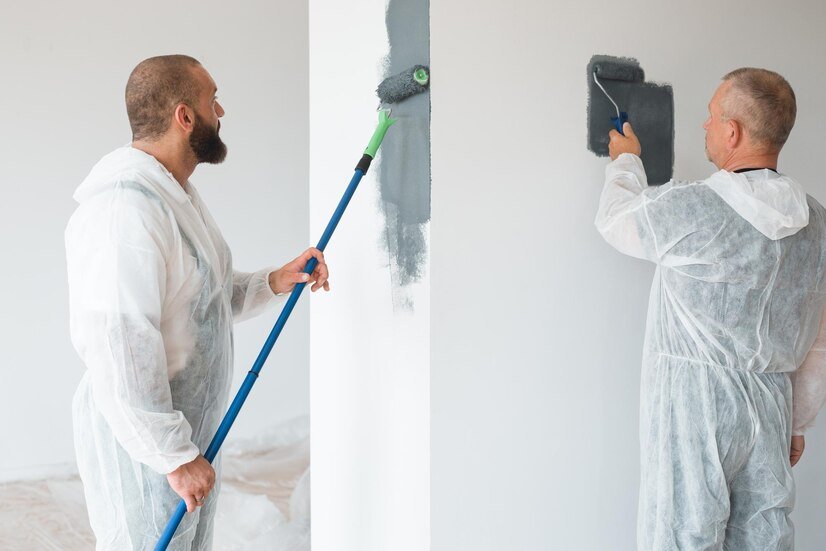
Mastering the Technique
- Brush Technique: For detailed areas, dip your brush into the paint and tap off excess to prevent drips. Apply the paint using a “W” or “M” pattern, which helps to evenly distribute the paint. Smooth out the application with overlapping strokes to avoid visible brush marks or uneven spots.
- Roller Technique: Load your roller with paint and roll it out on a tray to ensure even distribution. Start painting in a “W” pattern and then fill in the gaps, working in sections. Keep a wet edge by overlapping each section slightly to avoid lines or streaks. Reload the roller frequently to maintain even coverage.
Applying Multiple Coats
For the best results, it’s crucial to apply several thin coats of paint instead of one thick layer. Thin coats dry more evenly and reduce the risk of drips and runs. Allow each coat to dry completely according to the manufacturer’s instructions before applying the next. This waiting period is essential for proper adhesion and achieving a smooth, even finish. Applying multiple coats also ensures better color depth and coverage, leading to a more polished appearance.
Maintaining a Wet Edge
Maintaining a wet edge is key to a seamless, professional finish. Work in manageable sections, overlapping each area slightly while the paint is still wet. This prevents noticeable lines or patches and helps blend the new paint with the previously applied sections. Keeping a wet edge avoids streaks and roller marks by ensuring that the paint layers are applied uniformly, resulting in a smooth, consistent finish throughout the room.
Dealing with Common Issues
Even with careful preparation and application, you might encounter issues during room painting. Here’s how to address them:
- Drips and Runs: To fix drips, let the paint dry completely, then lightly sand the area with fine-grit sandpaper. After sanding, touch up the spot with a brush or roller to blend it with the surrounding paint. Apply paint in thin layers and maintain a wet edge to avoid drips.
- Streaks and Roller Marks: Streaks and roller marks can be remedied by gently rubbing the area with a damp sponge or brush, being careful not to damage the paint. Ensure even pressure and avoid overloading the roller, as too much paint can lead to streaks and uneven texture.
- Uneven Coverage: If you notice uneven coverage, apply a second coat of paint once the first coat has dried. Use consistent application techniques and a primer on patched or stained areas to ensure a uniform finish and better coverage.
- Textured Walls: For textured walls, achieve a smooth finish by using a high-nap roller or a paint sprayer, which can cover uneven surfaces more effectively. Ensure you use even pressure and apply paint in multiple thin coats to avoid buildup and achieve an even texture.
Finishing Touches
After completing the bulk of your room painting project, it’s time to focus on the finishing touches to ensure a truly flawless finish. Start by carefully removing painter’s tape once the paint is fully dry. Pull the tape away slowly at a 45-degree angle to prevent peeling and ensure crisp, clean lines.
Next, inspect the walls for any imperfections that may have emerged. For minor touch-ups, use a small brush or roller to blend in any areas that need correction. Be sure to match the paint’s color and finish to achieve a seamless look.
Finally, clean up your painting tools promptly to extend their life and maintain quality. Wash brushes and rollers with soap and water, and store them properly. Remove any remaining paint spills or splatters from the floor and trim to complete your project. These final steps ensure your newly painted room looks polished and professionally done.
Maintenance and Care
To keep your newly painted room looking fresh and vibrant, ongoing maintenance and care are crucial. Regular attention can prolong the life of your paint job and maintain its appearance. Here are key practices to follow:
- Regular Dusting: Regularly dust your walls using a soft, dry cloth or a vacuum with a brush attachment. Dust can accumulate and dull the paint’s finish, making the room appear less vibrant. Dusting helps keep the paint looking bright and clean by preventing buildup.
- Gentle Cleaning: For routine cleaning, mix a mild detergent with water and apply it with a soft sponge or cloth. Avoid abrasive cleaners or scrubbing pads, as they can damage the paint’s surface. Address any spots or stains quickly to prevent them from setting and causing lasting discoloration.
- Touch-Ups: Keep a small amount of leftover paint for touch-ups to address minor scuffs or scratches. Promptly fix any blemishes using a brush or roller to blend the new paint with the existing layer. This will ensure a consistent finish and prevent imperfections from worsening over time.
- Addressing Moisture Issues: Ensure proper ventilation in high-moisture areas like bathrooms and kitchens to prevent moisture buildup. Promptly address any leaks or water damage to avoid peeling, bubbling, or mildew growth on the painted surfaces. Proper maintenance helps preserve the integrity and appearance of your paint job.
Achieving a flawless finish in room painting requires careful preparation, mastering the right techniques, and addressing common issues effectively. By following these tips, you can ensure a smooth, professional-looking result that enhances the beauty of your space. Whether you’re tackling the project yourself or seeking expert assistance, the right approach makes all the difference.
If you prefer to leave it to the professionals, contact Full Coverage Painting at (707) 384-5108. Our team is ready to help you transform your rooms with exceptional quality and precision. Reach out today for a consultation and let us bring your vision to life!

