


Starting your first interior painting project can feel overwhelming, but with the right guidance, it becomes straightforward and rewarding. Whether you’re looking to refresh a single room or transform your entire home, knowing the step-by-step process can save time, effort, and money. This guide is designed to walk beginners through each stage of interior painting, from preparation to final touch-ups. By the end, you’ll be confident in your ability to tackle any painting job with professional-looking results. Let’s dive into the process and get started!
Gathering Materials and Tools
Before diving into your interior painting project, gathering suitable materials and tools is essential for a smooth and efficient process. The following items are necessary to ensure clean, professional results:
- Paint: Choose the appropriate type and finish for your walls (e.g., matte, eggshell, or satin).
- Primer: Helps paint adhere better, especially for new surfaces or color changes.
- Brushes: For detailed work and cutting in various brushes, including angled ones.
- Rollers and Roller Covers: Ideal for covering large wall areas quickly. Opt for different nap sizes depending on your wall texture.
- Painter’s Tape: Ensures sharp lines and protects edges.
- Drop Cloths: To protect furniture and floors from paint splatters.
- Paint Tray: This is for holding and evenly loading the roller with paint.
Preparation of the Room
Proper preparation is critical to achieving flawless results in your interior painting project. Follow these steps to ensure your room is ready for painting:
Clear the Space
Start by removing all furniture, decorations, and personal items from the room to give yourself ample space to work and avoid any damage. If large pieces of furniture cannot be moved, cover them with drop cloths or plastic sheeting to protect them from paint splatters or dust. Removing distractions ensures a more efficient and focused painting process.
Clean the Walls
Before applying paint, cleaning the walls to remove dust, grime, and oils that prevent the paint from adhering correctly is crucial. Use a damp cloth or a mild soap and water solution to wipe down the surfaces. A more robust cleaning solution may be necessary for tougher stains or grease spots—a clean, smooth surface results in better paint coverage and longevity.
Repair Imperfections
Inspect the walls for any holes, cracks, or other imperfections that could affect the final result. Use spackle or a patching compound to fill these areas, then allow them to dry thoroughly. Once dry, sand the repaired spots to create a smooth, even surface that blends seamlessly with the surrounding wall, ensuring that the paint applies evenly.
Protect Surfaces
To achieve clean lines and protect trim, windows, and door frames from accidental paint drips, apply painter’s tape along the edges of these areas. Carefully press the tape to ensure it adheres appropriately, preventing paint from seeping underneath. Taking the time to protect surfaces in advance ensures crisp, professional-looking results without time-consuming corrections later.
Cover the Floor
Lay down drop cloths or plastic sheeting to protect your flooring from paint splatters and spills. Use canvas drop cloths for better durability and to avoid slipping, especially if the floor surface is smooth or slick. Secure the edges of the cloth to prevent it from shifting during the painting process, which could expose parts of the floor to paint drips.
Priming the Walls
Priming the walls is essential in achieving a smooth and lasting finish for your interior painting project. Primer acts as a base coat that seals the wall surface, helping the paint adhere better and providing a uniform color. It’s especially important when painting over new drywall, covering dark colors with lighter ones, or hiding stains and imperfections.
To apply the primer, use a brush to “cut in” around the edges, such as corners and trim, then use a roller for larger areas. Ensure the primer is evenly distributed, and let it dry completely before proceeding with the paint. This usually takes a few hours, but drying times can vary depending on the product and room conditions. Proper priming sets the foundation for a flawless paint job and enhances the overall durability of your finish.
Cutting in the Edges
“Cutting in” the edges is a crucial technique in interior painting that ensures clean, sharp lines where the walls meet the ceiling, trim, and other edges. This step is typically done before rolling paint onto the main sections of the walls and requires patience and precision.
Start using an angled brush, allowing for better control and smooth strokes along tight edges. Dip the brush lightly into the paint, removing excess to avoid drips. Carefully apply paint along the edges, working in small sections a few feet at a time. Keep a steady hand to ensure you don’t overlap with areas like the ceiling or trim.
After cutting in, you can roll the rest of the wall, blending the roller strokes with the cut-in areas while the paint is still wet for a seamless finish. This technique is critical for professional-looking results.
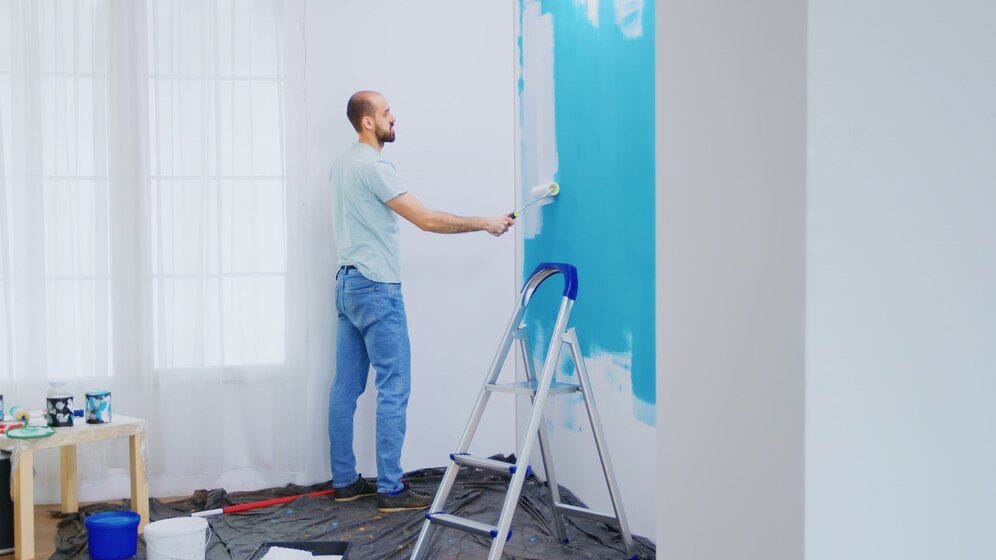
Painting the Walls
Painting the walls is the most exciting part of your interior painting project. After priming and cutting in, it’s time to use a roller to cover the main sections of the walls.
- Load the Roller: Start by dipping the roller into the paint tray, ensuring it is well-coated without overloading it. Roll the roller across the tray’s ridges to evenly distribute the paint and remove excess. This prevents drips and uneven application on the walls.
- Apply in a ‘W’ Pattern: Begin painting by applying the roller in a ‘W’ or ‘M’ pattern, which helps spread the paint more evenly over the wall. This method avoids creating visible lines or streaks, ensuring a more consistent and professional finish across the surface.
- Work in Sections: Focus on painting one wall at a time, ensuring you maintain a “wet edge” where sections meet. This prevents visible lap marks and blends the paint seamlessly. Overlapping wet areas ensures even coverage and a smooth transition between painted sections.
- Let it Dry Between Coats: Allow the first coat to dry completely before applying the next. This ensures proper adhesion and prevents the paint from peeling or lifting. Depending on the paint type, drying times can vary, so check the manufacturer’s guidelines.
Painting the Trim and Final Touches
Painting the trim is the final step in your interior painting project and requires precision for a polished look. To ensure clean lines, start using painter’s tape along the edges where the trim meets the wall. Use a small, angled brush to better control tight spaces and detailed areas.
To avoid drips and streaks:
- Begin painting the trim by applying thin, even coats.
- Allow the first coat to dry thoroughly before applying a second one for complete coverage.
- Paint in the direction of the wood grain or along the length of the trim for a smooth finish.
Once the paint has dried, carefully remove the paint’s tape at a 45-degree angle to avoid pulling the paint off. Please inspect for any touch-ups and address them to complete the project with a flawless, professional look.
Clean-Up Process
Clean-up is as necessary as painting, ensuring your tools are preserved and your space is left tidy. Follow these steps to wrap up your interior painting project:
- Clean Brushes and Rollers: After finishing, thoroughly rinse brushes and rollers under warm water for latex paint or use paint thinner for oil-based paints. Ensure all paint residue is removed, then squeeze out excess liquid. Let the tools air dry completely.
- Dispose of Paint Properly: Seal leftover paint cans tightly for storage, ensuring the labels are visible for future reference. For unused paint, consult local regulations for safe disposal, as improper handling can harm the environment and violate guidelines.
- Remove Drop Cloths and Tape: Gently peel painter’s tape while the paint is still slightly wet to prevent any damage to the fresh paint lines. Fold drop cloths containing paint spills and carefully remove them to avoid tracking paint.
- Final Inspection: Examine the walls for drips, smudges, or missed spots. Use a damp cloth to quickly address imperfections before the paint dries completely, ensuring a clean, professional finish with no visible errors.
Final Inspection and Review
Once the painting is complete and everything has dried, it’s time for the final inspection to ensure a flawless finish. Begin by carefully examining the walls, trim, and edges in good lighting to spot imperfections, missed areas, or uneven coverage.
If you notice any drips, streaks, or light spots, lightly sand the area if necessary, then touch up with a small brush or roller. Pay close attention to corners and where the walls meet the ceiling and trim, as these areas often require precision.
Additionally, check for any splatters on the floor or furniture and clean these up immediately if found. Once everything looks perfect and you’re satisfied, allow the paint to cure completely before moving the furniture back in. This final review ensures your interior painting project’s professional-looking, long-lasting finish.
With this step-by-step guide, tackling your interior painting project can be manageable and rewarding. By following these simple yet effective techniques, you’ll achieve a professional finish that refreshes your space and adds value to your home. However, if the process seems overwhelming or you’d prefer expert help, Full Coverage Painting is here. Our experienced team provides high-quality interior painting services tailored to your needs.
Contact us today at (707) 384-5108 or at fullcoveragepaintinginc@gmail.com to schedule a consultation. Serving Vacaville, CA, and surrounding areas, we’re ready to bring your vision to life with a flawless paint job.

